AdSense

Showing posts with label *simmering. Show all posts

Sunday, February 1, 2015

Mussels in Buttery Lemon Garlic Sauce


This is just one of the dishes that I loved and won't mind having it often. 

I wished that I had prepared some toasted bread to clean up the sauce.  The sauce was cleared up anyway, because I mixed my rice with it and ate it all up.  Burp!

Ingredients:
  • 8 to 10 frozen mussels, thawed and cleaned

Sauce:
  • 20g Butter
  • 3 - 4 Garlic, minced or grated (you can use a garlic press)
  • 200g Cooking Cream
  • 1/2 teaspoon Dried Thyme or a small handful Fresh Thyme
  • 1 to 2 teaspoon Lemon Juice or to your taste
  • Salt and Ground Black Pepper to taste
  • Zest of half a lemon (optional)

How to to it:
  1. Melt butter in a pan.
  2. Add garlic and saute till soften and fragrant but not browned.
  3. Add cream and Thyme.
  4. Cook in medium low heat till the sauce bubbles.
  5. Continue cooking till the sauce starts to thicken.
  6. Add in the remaining ingredients for the sauce.
  7. While the sauce is cooking, prepare the mussels. 
  8. Make sure the mussels are thawed, cleaned and dabbed dry.
  9. Arrange mussels in a oven proof dish.
  10. Once the  sauce is ready, pour it over the mussels.
  11. Bake in preheated oven at 230C for 7 mins.
  12. Serve immediately.

Notes:
  • If you do not have a oven, you can also cook.
  • Place the mussels down on the pot; shell facing up.
  • Simmer for about 10mins till mussels are completely heated thru.
  • I preferred oven baking as it will brown the surface a little and has a more even cooking for the mussel.


Tuesday, July 1, 2014

{ Breakfast : Grilled Portobello Mushroom with Ham, Bacon and Poached Egg }


This was last Saturday's breakfast which was some of our favourite food that I have combined together as a meal. 

I have the oven working on the mushroom and cheese, the grill pan on the bacon and the deep pan on the poached egg at the same time, while I prepare the salad.


For the Portobello Mushrooms, I spreaded 1/2 teaspoon of butter and seasoned it with salt and pepper.  I let it grill in the oven at 250c for 10 minutes.  In between grilling, I turned the mushrooms and let it the other side of the mushroom soak up and juice and continue grilling.  Just before the mushrooms are done, place 1 or 2 slices of ham on the mushroom to heat it up.

I sprinkled some Shredded Parmesan Cheese on a piece of baking paper and let it turn brown and crisps at the same time as  the mushrooms are grilling.

Meanwhile, pan grill the bacon till they are brown and crispy. Let them sit on paper towel to drain excess oil.

While the rest are cooking, have a a pan or pot filled with water deep enough to cover eggs.  Let the water be in a gentle simmer.  You will see tiny bubbles from the base of the pan or pot but the water should not be jumping. reduce the heat to the lowest you can get just to maintain heat.  Add a teaspoon of vinegar to the water. 
Now, crack the egg into a bowl (I'm using cold eggs).  Gentle pour out into the pan with hot water.  Let it simmer for about 4 minutes or to your preferred done-ness.  Use a slotted spoon to gentle remove the egg.  You can do a few eggs together or one at time.

Dish the mushroom with ham on the plate. Gently place the poached egg on the mushroom. Top with bacon, Break the Parmesan chips into smaller pieces and sprinkle over. Drizzle with truffle oil and season with salt and pepper.

Breakfast is served.


Tuesday, March 18, 2014

Ika Meshi


Super short post here cos I'm busy busy busy today.  Taking a break to share some food here.

I made some glutinous rice stuffed squid, better known as Ika Meshi, for dinner.  If you like what you see, hop over HERE to the write up on how it is done.

Okay, I'm going back to my kitchen to continue cooking stare at the Ika Meshi!

Monday, January 13, 2014

Chicken Soup with Shark's Cartilage
鲨鱼软骨鸡汤


I hesitate for a long time before deciding to share this recipe.  Why?  Because it involve Sharks. Yes, sharks.  I realised anyone sharing anything about eating sharks (fins) gets lots of flaming.

I'm not trying to go against environmentalists out there who are against eating Shark's Fin and promote eating it here. Like I mentioned before in some of my posts, I will not encourage eating it but will not reject it if it's served to me. It will be a waste of food, whether or not if it's Shark's Fin. 

Just a thought here.  Maybe if we all start eating Shark's meat like what we used to do, the fishermen will not just harvest the fins and throw the remains back into the sea.  Shark's meat was my father's favourite. I remembered eating it very often when I was a child. My father often cooked it with Black Fermented Bean.  Even the Lor Mee I had when I was a child was loaded with the soft and sweet Shark's meat. I do not know when the wet markets stopped having Shark's meat for sale. Finding shark's meat is even harder than Shark's Fin now. :P

Anyway, if you are still thinking of flaming me or send me hate mails for this post, please do the same for those who are sharing about Foie Gras too.  It is cruel how the geese are raised and fed, all for its liver.  No?  BUT, Foie Gras remains a delicacy and is much loved by many.  Not much petitions to stop eating Foie Gras around leh.  Well, not as much as Shark's Fin.  Everybody is still happily eating it. :P  Not very fair to the geese, you know.  Likewise for any other animals which are raised in harsh environment so that the farmers can get the most of them. :P  They, the farmers, are the ones who needed the 'education'.  ;)

For me, I just want to share a collagen rich recipe here. Not to start a food war or anything. If you don't like what you see, you can just leave.  And don't waste time sending me hate mails or comments. I get lots of those before.  Doesn't affect me much nowadays.  Just go spend your time usefully somewhere else.  Thank you.  ;)


Please note that this soup is for those who are very patient.  You need at least 4 hours of simmering to to turn the cartilage into gelatinous/jelly like and the soup milky.  The cartilage shown in the pictures here had only be simmered for 2 hours (just so you can see how it's going to be like half way into cooking).  You can see part of it turning jelly like.  You won't be seeing much of the cartilage or rather the shape of it after 4 hours.

Ingredients:
  • 1 large Shark's Cartilage
  • 1 Chicken Carcass
  • 10 Chicken Feet
  • 2 Chicken Drumstick
  • a handful Wolfberries
  • a slice of Ginger
  • 3 litres Water

How to do it:
  1. Blanch shark's cartilage, chicken carcass, feet and drumstick.
  2. Add all the above, except drumsticks, and ginger into a pot of water.
  3. Bring to a boil before reducing to a simmer.
  4. Simmer for 3 hours before adding the chicken drumsticks.
  5. Continue to simmer till the shark's cartilage turn gelatinous/jelly.
  6. Add in the wolfberries and cook for another minute.
  7. Add salt to taste.
  8. Serve.

Note:
  • I add chicken drumstick at a later time as I'll serving it with the soup. If you just wish to serve the soup without any meat, you can omit it.
  • You may use other parts of chicken instead of drums if you wish.
  • Please eat whatever gelatinous cartilage that has not all melted into the soup and not just drink the soup only. It's packed with collagen


Wednesday, July 24, 2013

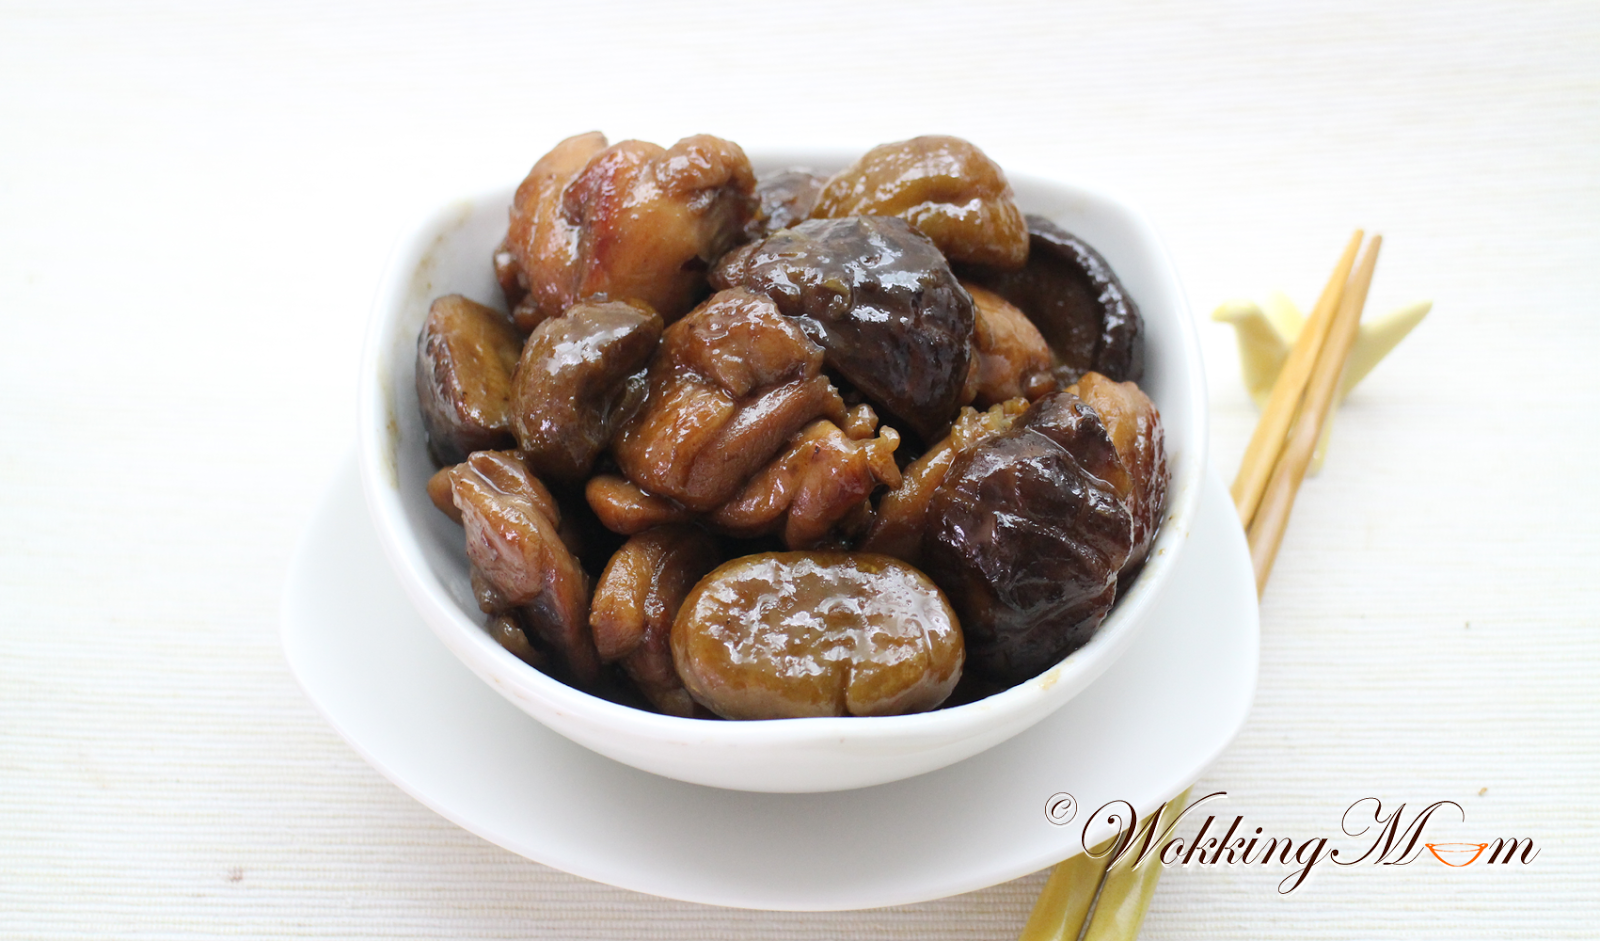
Braised Chicken with Chestnut
栗子焖鸡


This is one of the earlier dishes that I shared in this blog, which the pictures had gone missing.  I never had a problem having this with just a bowl of rice. My family enjoy this too!

I'm updating the pictures (and hope that they will not go missing in years to come) and a new recipe.


Ingredients:
  • 3 Chicken Drumstick, debone and cut into 3
  • 8 Fresh Shitake Mushroom, stalk removed and cut into half
  • 120g Fresh Chestnut
  • 4 clove Garlic
  • 2 slice Ginger
  • 2 tablespoon Cooking Oil
  • 1 tablespoon Sugar
  • 1 tablespoon Light Soy Sauce
  • 1/2 tablespoon Cooking Wine
  • 250ml Chicken Stock
  • 1 tablespoon Oyster Sauce
  • 1/2 tablespoon Sugar (additional)
  • 1/2 tablespoon Sesame Oil

How to do it:
  1. Marinate chicken with light soy sauce and cooking wine for 30 mins.
  2. Heat wok with oil.
  3. Add chestnut, ginger and garlic.
  4. Stir fry till garlic and ginger are fragrant.
  5. Dish out and set aside.
  6. Add in 1 tablespoon sugar to existing oil used to stir fry chestnut.
  7. Melt sugar to caramelise it.
  8. Add in chicken without marinade.
  9. Stir fry till chicken are evenly brown.
  10. Add in mushroom and stir fry well for another minute to let the mushroom absorb some sauce.
  11. Return the chestnut, garlic and ginger.
  12. Add the chicken stock and bring to a boil.
  13. Reduce heat to a simmer.
  14. Add oyster sauce and sugar.
  15. Continue to simmer for 25 mins till chestnuts are tender and sauce almost dried up.
  16. Add in sesame oil and stir well before serving.

Note:
  • I'm using fresh shitake mushroom as it's more acceptable for the kids and also easier for the kids to eat. Choose dry and firm fresh shitake mushroom so it will still have a firm bite after the braising. You can replace fresh mushroom with dried ones. Just soak them them till they are soften.
  • I'm using debone chicken drumstick as it's more tender and easier for the kids to eat. You don't have to debone the chicken and also use chicken parts instead of just chicken drums.
  • If you do not have chicken stock, you can use water with a teaspoon of chicken powder and add salt to taste at the end of cooking.
  • You can add a few dried chilli in step 3, if you prefer a little spicy.


Thursday, July 11, 2013

Flower Crab with Glass Noodles
花蟹冬粉


I had always wanted to try Crab with Tang Hoon aka Glass Noodles. I never had the chance; mainly because of the kids. Hence, to date I do not know how it tasted like. :P

I decided to do a trail on error for this dish and it turn out to become my son's favourite. He skipped his usual dinner and finished this whole lot, excepting the crab.

My food reviewer (husband :P) said my version is more like what he had in China which is a bit saucey. Those in Singapore are drier and the tang hoon is more fragrant. However, he thought it was pretty tasty. ^^  It will be better if dark soy sauce was added though to give the tang hoon more colour. I didn't notice that I had run out of it.  Next time, it will be better. :)


Ingredients:
  • 1 Crab Crab, cleaned and chopped into 4 parts
  • 100g Glass Noodles aka Tang Hoon
  • 4 slices Ginger
  • 3 clove Garlic, chopped

Seasonings:
  • 1/2 teaspoon White Pepper1 tsp chicken seasoning powder
  • 1 1/2 tablespoon oyster sauce
  • 1 tablespoon Light Soy Sauce
  • 1/2 tsp dark soya sauce
  • 1 tsp fish sauce
  • 1/2 tsp Sugar
  • 500ml Chicken Stock (reduce if you prefer it drier)
  • Salt to taste.

How to do it:
  1. Soak tang hoon till it's soften.
  2. Drain and set aside.
  3. Heat wok with a tablespoon oil.
  4. Stir fry ginger and garlic till fragrant.
  5. Add in the crabs.
  6. Stir-fry till crab turns red.
  7. Add in the seasonings except for salt.
  8. Bring to a boil.
  9. Add in the tang hoon.
  10. Simmer for about 10-15 mins to let the tang hoon absorb the sauce and flavour.
  11. Stir fry to evenly cook the tang hoon.
  12. Add salt to taste if necessary.
  13. Serve immediately.


Friday, June 14, 2013

Homemade Nama Chocolate
自制日本生巧克力


I had always wanted to try making Nama Chocolate ever since a friend told me that it was super easy to do with only just 2 ingredients; excluding the cocoa powder.

So last night, I brought out my going to expire chocolate chips and tried my hand on the so called super easy treat. It was so much harder! And I made a mess in my kitchen. I swear then I'm going to kill my friend. LOL

Due to hot weather, the firmed up chocolate started to soften as soon as it was taken out of the fridge. Not only was it difficult to make prefect blocks with clean and straight edges, it was really difficult trying to lift the softening chocolate blocks after dusting them with cocoa powder. It went out of shape. :(

Those following me on Instagram got a first look on my very ugly Nama Chocolate last night. :P  Maybe it was due to the type of chocolate I used too. The result could be better if a better quality chocolate was used instead.

Anyway, I tried to savage the remain chocolate, coming up with my own way of making it. I left them in the freezer and worked on them this morning. (Gasp! Won't temperature be higher in the morning than midnight?!!) I was keeping my fingers crossed.

With the extra steps and additional cold tin, the 2nd batch of Nama Chocolate was way much better than the first. Not perfect but descent enough. At least, My kids can pick the chocolate up with no chocolate stains on their fingers. It was so much easier to work with since in was left in the freezer which makes it a longer to soften. That really helps as it gives me more time to do the cutting and cocoa dusting.

I urge you to finish reading and understand the recipe, especially the notes that I have shared before you start making this. There is a reason why you are paying that much for a box of Royce Nama Chocolate. ;)


Ingredients:
  • 400g Chocolate, chopped into bits (I use Hershey's Semi-Sweet Chocolate Chips)
  • 200ml Whipping Cream
  • Cocoa powder for dusting

How to do it:
  1. Heat whipping cream in a saucepan.
  2. When it starts to bubble, turn off the heat. You just want to warm the milk not boil it.
  3. Gradually add chopped chocolate into the whipping cream.
  4. Stir to melt the chocolate and incorporate it into the cream.
  5. When all the chocolate has melted in the cream, it will resemble a thick chocolate ganache.
  6. Prepare a baking tin with baking paper in it, including the sides.
  7. Pour the chocolate mixture into the tin.
  8. Level the mixture.
  9. Cover with cling wrap with cling wrap sticking to the chocolate mixture.
  10. Let it firm up in the freezer.
  11. Cut the hardened chocolate into blocks with a knife.
  12. Dust with cocoa powder.
  13. Return to the fridge till you are ready to eat them.

Note:
  • The chocolate melts fast so you have to work fast.
  • After cutting the chocolate into blocks, I return them to the freezer again to firm them up again before I bring them out to dust with cocoa powder.
  • If you have problems cutting the chocolate into blocks, heat your knife in hot water, dry and clean it before using it to cut the chocolate.
  • I prepared another tin in the freezer. I lay it with baking paper and dusted with cocoa powder when it's ready to be used. I placed the cut up blocks of chocolate in the prepared tin. It helps to keep the temperature down so the chocolate block don't start to melt as you cut up the rest of the chocolate. The cocoa powder also helps prevent the chocolate blocks from sticking to the baking paper should they start to softened and melt.
  • Return the chocolate blocks to the freezer to firm them up if they start to softened. After that, you can continue with the dusting.
  • I did not use a good quality chocolate, preferably couverture chocolate, so my 'treated' chocolate did not totally hardened even I left it in the freezer. It was still slightly soft.
  • If you are using a good quality chocolate, you might want to firm it up in the fridge instead so you wont have a problem cutting it. If so, please skip step 9, which is prevent icy crystal from forming on the chocolate.
  • Once the chocolate blocks have been dusted with cocoa powder, you can choose to either keep them in the fridge for a couple of days or in the freezer for a few days longer.

Monday, June 10, 2013

Flower Crab Porridge
花蟹粥


I'm sure most of you know how to make porridge. Rice grains plus water and boil till the grains break up.

However, that's not how I usually makes my porridge.  I make porridge using cooked rice and I have been doing it since my kids started eating porridge. My aunt told me that this way of making porridge is better (for kids) as it causes less wind. Err ... I'm not quite sure about the wind part. I only find it easier to make especially flavoured ones, for this instance, Flower Crab Porridge. I find time use to cook the porridge using cooked rice is shorter and not to messy to eat.

The one question we always have when we make porridge is, how much water is need? Usually it will be an estimation. If the porridge is drying p during cooking add more water or scoop out the excess water. Right? It's easy if you are making plain porridge but if you are making making say flavoured ones, adding more water will ditule the taste (unless you made extra stock to add on), throwing out excess water will be a waste.

Whichever way it is done, porridge, plain or flavoured, is always my comfort food, especially on a cold rainy day.


Ingredients:
  • 1/2 cup or 80g Rice Grain
  • 2 Flower Crabs, clean
  • 1.5 - 2 litre Homemade Chicken Stock
  • 2-3 slices Ginger
  • 1 teaspoon Chinese Cooking Wine
  • 1/2 teaspoon Chicken Powder (optional)
  • Salt to taste

How to do it:
  1. Cook the rice as normal in rice cooker.
  2. Meanwhile, prepared the crabs.
  3. Pull out and remove the tail flap.
  4. Open the upper shell and remove and discard the gill and innards.
  5. Chop the crab into 2 parts each.
  6. Place the crab parts into the chicken stock.
  7. Bring to a gentle boil for 10 minutes or till just cooked.
  8. Remove the meaty parts of the crab.
  9. Remove the crab meat.
  10. Set the meat aside and return the remaining shells to the stock to continue cooking for 15 minutes.
  11. When the rice is cooked, scoop it out into a pot.
  12. Pour the drained stock into the pot with the rice.
  13. Add in the sliced ginger.
  14. Bring the rice with stock to a boil.
  15. Reduce to a simmer.
  16. Continue cooking for 20 - 30 minutes, stirring it occasionally to prevent the grains from sticking to the bottom of the pot.
  17. Cook longer for a smoother congee-like consistency.
  18. Add in the crab meat.
  19. Season with the cooking wine, chicken powder, if using, and salt.
  20. Serve, here with fried shredded ginger and it's oil and spring onion.

Note:
  • In step 12, you can add the chicken stock in parts instead of adding all at once.  Add more stock later if you find the porridge too thick.
  • I cooked and removed the meat of the crab so it will be easier to eat. You can add the crab parts with the cooked rice and stock to cook together if you like.
  • To remove the crab meat in step 9, you can use a pair of kitchen scissor to cut open the crabs. You can only do this if you are using flower crabs as they have much softer outer shells.


Friday, April 19, 2013

Oden
关东煮


This is my third and final dish that I will be sharing from last Friday's dinner.

Although this is a very simple dish, almost like instant soup dish, it has always been my favourite. It's one of the items that I will eat when I visit the Japanese Restaurant, Kuishin-bo.

Oh, I have to state here that this is not the traditional Japanese Oden. I'm only doing a replica (on the soup base) of what I had in Kuishin-bo. The ingredients for the Oden used are from a Yong Tau Foo stall. You can go ahead and get Konyaku, Kabocha, Tsukune, etc for a more authentic Oden. ;)

I'm using instant Hon Dashi Stock Powder to make Dashi. You can make your own Dashi by using Kombu and Bonito Flakes.

Ingredients:
  • 1 Daikon/White Radish, top removed, skinned and cut into 1 1/2cm thick
  • Assorted Surimi like, Imitation Scallops, Chikuwabu

Ingredients for Stock Base:
  • 750ml Water
  • 1 1/2 teaspoon Hon Dashi Stock Powder
  • 2 tablespoon Light Soy Sauce
  • 1 tablespoon Mirin
  • 1 tablespoon Sake
  • 1/2 tablespoon Sugar

How to do it:
  1. Soak prepared daikon in water for half an hour and drain.
  2. Bring a pot of water to a boil.
  3. Add the daikon and boil for 2 minutes and drain.
  4. Meanwhile, prepare the stock base by bring all ingredients required for the base to a boil.
  5. Add daikon to the stock base.
  6. Let it simmer for an hour or till daikon is tender and opaque.
  7. Add in the rest of the surimi items.
  8. Continue to let it simmer for 15 mins or longer if you prefer.
  9. Dish out and serve.

Wednesday, April 17, 2013

Pork and Vegetable Stew
土豆红萝卜炖肉片


This is one of the dishes that I prepared last Friday for dinner. This is one of my favourites as it is very easy to make.

I shared a similar recipe years ago but using beef. Here, I used pork instead. You can use pork or even chicken if you like. Though my husband prefers beef and I, pork with lots of vegetables.

I'm using thinly sliced (shabu shabu) meat as it helps cut down cooking time and it's easier for the kids to eat.

Ingredients:
  • 150g Thinly sliced Pork, (shabu shabu Pork)
  • 1 large Potato, skinned and chopped into chunks
  • 1 Medium Carrot, skinned and chopped into chunks
  • 1 Onion, wedged
  • 1/2 tablespoon Mirin
  • 1 tablespoon Sake
  • 1 1/2 tablespoon Light Soy Sauce
  • 1/2 tablespoon Sugar
  • 1/2 teaspoon Hon Dashi Powder
  • Salt to taste
  • 250ml Water

How to do it:
  1. Stir fry pork with a little oil till almost cooked.
  2. Remove and set aside.
  3. Add in the vegetables into the same pot used to cook the pork to stir fry.
  4. Add in the remaining seasoning except for salt.
  5. Bring to a boil before reducing heat into a simmer.
  6. Simmer till vegetables are tender..
  7. Return the pork back into the pot and continue to simmer for another 10 minutes.
  8. Add salt to taste if necessary.
  9. Serve with rice.

Note:
  • You can use thicker slice meat too. However, add the meat together with the vegetable to cook so the meat will be tender enough.
  • You can thicken the sauce with some corn flour as it helps make the meat velvety.


Wednesday, April 10, 2013

Mac and Cheese with Ham Gratin
芝士火腿烤意大利粉


Many years ago, my BFF Shirley and I frequent this Japanese Restaurant at Scotts Isetan very often after work. I always order their Macaroni with Teriyaki Chicken Gratin. (I'm a boring person).

It's different from the American's Mac & Cheese, which is basically Macaroni with Cheese Sauce, if I'm not mistaken. This Japanese Macaroni Gratin, is not as thick or over loaded Cheese Sauce. It's more like a cream sauce with Cheese in it and the top is baked with golden Parmesan Cheese. It could be other Cheese though but I'm sure it's not breadcrumbs that gives it the colour. ;) And it goes really well with the succulent Teriyaki Chicken, which I shall add on the next time I improve on this dish. :)

The restaurant has closed years ago and we haven't found any Macaroni and Cheese Gratin quite close to theirs. As much as I tried my best to replicate the dish, I too didn't come close to it.

Well, if you would like to try making your own Mac & Cheese Gratin instead of buying the instant ones from the supermarkets, you might like to try my recipe. At least, it helps clears out Cheese scraps for mommies who are into making bentos for their kids.


Ingredients (for 1 portion only):
  • 60g Macaroni or Assorted Pasta
  • 50g Chopped Ham
  • 1-2 tablespoon Parmesan Cheese
Sauce:
  • 15g Butter
  • 100ml Cooking Cream
  • 120ml Water
  • 1 tablespoon All Purpose Flour
  • 2 slices Cheddar Cheese
  • 1 slice Regular Cheese

How to do it:
  1. Cook macaroni in salted water according to the package or till just done.
  2. Pour them in a oven proof dish and set aside.
  3. Meanwhile, melt butter in a pan on low heat. Butter should not be burning.
  4. Gradually add in the flour and whisk till smooth.
  5. Turn up the heat to medium low and gradually add in the cooking cream while whisking.
  6. Repeat the same for the water.
  7. Add in the ham.
  8. Melt the cheese in the sauce till all has blend in.
  9. Pour the sauce over the cooked macaroni. Mix them if you like.
  10. Top it with Parmesan Cheese.
  11. Baked in a preheated oven at 220c for 10 mins.
  12. Serve hot.

Notes:
  • Do not cook the roux (butter with flour) in high heat as it will burn and the roux will turn dark.
  • The amount of water add depends on how thick you want the sauce to be. Hence, add gradually and stop adding if you think the sauce is thin enough for you.
  • I recommend you use 2 slices of cheddar cheese with 1 slice of regular or mozzarella. You can have any combination you like.
  • For those who do not have an oven, you may serve it after step 10, with salt and ground pepper to taste, if you like.


Tuesday, January 29, 2013

Seafood Treasure Pot
海鲜一品锅


This not to be confused with Pen Cai 盆菜 (Literal meaning "basin-vegetable") which has a lot more ingredients.

I'm experimenting with Chinese New Year and thought this would be a nice dish for the occassion.  Although there are some preparation work to be done, it's still relatively simple and easy to prepare this.

So, do you think this is good enough to serve on Chinese New Year Reunion Dinner?


Ingredients:
  • 100g Broccoli, cut into florets
  • 6 Fresh Shitake Mushroom, clean with damp cloth and stems removed
  • 100g Fish Maw 鱼鳔, soak to soften
  • 80g Bamboo Pith aka Bamboo Mushroom 竹笙, soak to soften
  • 6 Large Prawns, shelled and deveined
  • 4 Dried Large Scallops, soak for at least 30mins; retain water
  • 4 Dried Oyster,, soak for 30 mins
  • 10g Moss 发菜, soak to soften, drained and set aside
  • 1 teaspoon Sugar
  • Cornflour Mixture as Thickener
  • a dash of Sesame Oil

Seasonings:
  • 1 tablespoon Abalone Sauce
  • 1 tablespoon Oyster Sauce
  • 1 tablespoon Chinese Cooking Wine
  • 600ml Water, including water used to soak Dried Scallops
  • 1/3 teaspoon Sugar or to taste
  • Salt to taste
  • a few drops Dark Soy Sauce for colour

How to do it:
  1. Clean prawn and add 1 teaspoon sugar.
  2. Marinade and coat prawns well with sugar.
  3. Refrigerate for 20 mins. Cover the prawns so it will not dry up.
  4. Drain fish maw and bamboo pith from water.
  5. Blanch for 1 min, drain and set aside.
  6. Add fish maw, bamboo pith, dried scallop, dried oyster and mushroom into a pot.
  7. Add seasonings except sugar, dark soy sauce and sesame oil.
  8. Bring to as boil then reduce heat to a simmer for 30 mins.
  9. Meanwhile, blanch Broccoli for 5 mins or till tender.
  10. Drain and set aside.
  11. Blanch prawn for 30 seconds or just cooked.
  12. Drain and set aside.
  13. Add the remaining seasonings to the simmering pot.
  14. Add in dried moss, blanched broccoli and prawns.
  15. Simmer for a min.
  16. Gradually stir-in cornflour mixture to your desired consistency.
  17. Serve immediately.

Note:
  • You can replace prawns with fresh scallops if you like.
  • When choosing fresh shitake mushrooms, look for those that dry and firm on touch.
  • Add a bit more (hot) water if you find the sauce drying up during simmering.


Thursday, August 23, 2012

Lotus Root Soup with Peanut
花生莲藕排骨汤


As mentioned in one the the earlier post on #cookforfamily, I'll be sharing the soup that I have prepared for that meal.

This is one of the family's all time favourite soup. I'm pairing the Lotus Roots here with peanuts. Another of our favourite pairing is with Cranberry Beans (珍珠豆).

I'm re-posting this recipe here as the older post I shared some time back is missing the photo. :( Blogger got hungry and 'ate' up the photos in my blog from year 2006 to 2007. I still have a year's posts that's missing the photos which I'm finding time to add them back to the post.

If you come across posts, especially post from the 2 years mentioned, you will see a blank black patch. There's no problem with your browser or my blog. It's just missing. :/

Enjoy this soup while I find time to reload the missing photos. ;P

Ingredients:
  • 300g Pork Ribs
  • 1 section Lotus Roots (about 400g)
  • 80g Peanuts
  • 1 pieces Dried Octopus
  • 8 Dried Red Dates, pitted
  • 1.8 litre Water
  • Salt to taste

How to do it:
  1. Blanch the pork ribs in boiling water for 5 min then remove.
  2. In a new pot of water, add in all ingredients except salt.
  3. Bring it to boil and turn down fire.
  4. Continue to simmer for 3 hours.
  5. Add salt to taste.
  6. Serve.

Tuesday, August 7, 2012

Frog Leg with Ginger and Scallion
姜葱田鸡脚


Some may consider frog legs as an exotic food. In some Asian Countries, it is a rather common dish.

It tasted like chicken. However, if you over cook it, it will become very chewy and tough and almost impossible to swallow.

I remember my mother and auntie used to bring me and my brother out for dinner and they will order this. They said, eating frog leg nourishes and strengthen our legs. Frogs being great jumpers ... get it? ;P

If you like to have strong legs, maybe you would like to try it? ;p

Ingredients:
  • 3 Frogs, skinned, cleaned and chopped into smaller pieces
  • 2 sprig Scallion aka Spring Onion, chopped into sections
  • a small knob Ginger, juvenile
  • 1 clove Garlic, smashed but not minced
  • 2 tablespoon Cooking Oil
  • Salt to taste
  • Cornflour with water mixture (thickener)

Marinade:
  • 1 tablespoon Corn Flour
  • 1/2 teaspoon Baking Powder
  • 1 teaspoon Sesame Oil
  • 1/2 tablespoon Chinese Cooking Wine

Seasonings:
  • 1 teaspoon Light Soy Sauce
  • 1/2 tablespoon Oyster Sauce
  • 1/2 teaspoon Dark Soy Sauce
  • 1/2 tablespoon Chinese Cooking Wine
  • 200ml Water

How to do it:
  1. Marinate frog with marinate for at least half an hour.
  2. Heat oil and saute white part of spring onion, garlic and ginger till fragrant.
  3. Add in frog parts while stir-frying.
  4. Stir-fry for about a minute till almost cooked
  5. Add in the seasoning.
  6. Simmer for 5 minutes.
  7. Gradually stir in the thickener to the consistency you like.
  8. Add salt to taste, if necessary.
  9. Add in the remaining spring onion.
  10. Stir well and serve immediately.

Note:
  • If you want more sauce, add more water and adjust the seasonings accordingly.
  • Add 1 or 2 de-seeded fresh red chilli in step 2 if you want it spicy.

Monday, July 23, 2012

Chocolate Milk Pudding
巧克力牛奶布丁


We are an odd family who doesn't like soya beancurd (豆花). Well, all except my husband. So even when there was a craze over homemade soy beancurd amongst my Facebook friends sometime back, it never tempted me to make it.

This milk pudding is what I always make for my family which has the smooth texture the soy beancurd has. I tweaked using my old mango pudding recipe, using milk instead of mango juice. As I used gelatin here, it will 'melt' (生水) if you leave it out for too long. So it's best to serve when you are ready to eat.

You can see that my pudding has 2 layers. That's because I stirred in some chocolate syrup before I pour the mixture into the cups. The syrup settled to the bottom and form the darker layer. You can leave that out if you don't want it.

Ingredients (for 4 cups):
  • 400ml Chocolate Milk
  • 100ml Whipping Cream
  • 15g Gelatin
  • Sugar/Chocolate syrup to taste (optional)

How to do it:
  1. Mix Chocolate Milk and whipping cream well.
  2. Bring the mixture to a simmer.
  3. Add in gelatin.
  4. Stir gently to melt gelatin completely.
  5. Add sugar or chocolate syrup if you like. Sugar to melt completely.
  6. Pour mixture into cups.
  7. Chill in fridge till set.
  8. Serve chilled.


Thursday, May 17, 2012

Shark's Fin Melon with Cordyceps Militaris
虫草花顿鱼翅瓜汤


One of my son's favourite soup is Shark's Fin Melon Soup and my daughter's orange soup, Cordyceps Militaris Chicken Soup.

Here, I combine both their favourites. Cordyceps Militaris makes the soup extra fragrant and sweet. This is one of the few soups that they both like. Usually, when one of them like a certain soup, chances are, the other one hates it. =_=|||

You probably know what I'm going to say next. "I have weird kids." :P


Ingredients:
  • 500g Shark's Fin Melon, skin and seeds removed and cut into smaller pieces
  • 250g Pork Ribs
  • 1.5 ltr Water
  • 15g Cordyceps Militaris 虫草花
  • 2 tablespoon Wolfberries 枸杞子
  • 8 Dried Seedless Red Dates 红枣
  • Salt to taste


    How to do it:
    1. Blanch pork ribs.
    2. Place blanched pork ribs in a fresh pot of water.
    3. Put all ingredients, except wolfberries and salt in a pot.
    4. Bring to a boil before reducing to a simmer.
    5. Simmer for 3-4 hours.
    6. Add wolfberries during the last hour before end of cooking
    7. Add salt to taste.

      Monday, April 16, 2012

      Asari Miso Soup
      蛤蜊味噌汤


      This is a combination of clams in clear soup and miso soup. It is one of the soups I love to order when I dine-in at Japanese Restaurants but tried not too because it's not worth it. :P

      I'm using instant dashi powder here for the stock. You can get kombu and bonito flakes to make your own dashi stock. The recipe can be found HERE.

      Ingredients:
      • 400ml Dashi Soup Stock or Water with 1 teaspoon instant Dashi Powder
      • 200g Clams, (short neck clams were used here)
      • 1 tablespoon Miso paste or to taste
      How to do it:
      1. Scrub and clean clams.
      2. Soak the clams in the salted water for an hour to let the clams spit out any sand.
      3. Put dashi soup stock and clams in a pot and bring to a boil. 
      4. Reduce to a simmer and skim off any foam. 
      5. Drain the clams from the stock and discard any clams that did not open.
      6. You might want to filter the stock to remove any sand from the clams that were not removed during initial soaking.
      7. Return the stock to the pot and bring it to a gentle simmer.
      8. Dissolve the miso paste in the stock and turn off the heat.
      9. Place clams in bowls and pour miso soup over.
      10. Serve.

      Note:
      • If you find the extra steps (5-7) troublesome, just pick up the clams that remain closed and continue with step 8.


      Wednesday, June 22, 2011

      Glutinous Stuffed Squid 烏賊飯


      I had this years ago and have never come across it again. I totally miss it, hence I'm trying my luck to replicate it. This is my second attempt on this dish. It's definitely much better my first attempt. ;)

      If you would like try it out, here's how I did it. I soaked about 4 to 5 tablespoon of glutinous rice, which is enough for 2 squids, in water BUT seasoned with a tablespoon of light soy sauce, 1/4 tablespoon each of sugar and mirin. I soaked the rice for 3 hours.

      Meanwhile, remove the innards of the squids. When the rice is done soaking, stuff the rice in the squid till 3/4 full. Use a toothpick or skewer to seal the opening. However, be careful not to tear the squid because it will be harder to secure it again and not having it 'explode' while cooking.

      Place the stuffed squids in a pot with enough water covering it. Add in 2 tablespoon of light soy sauce, 1 tablespoon Mirin, and a 1 tablespoon of sugar. Bring it to a gentle boil then reduce to a simmer. Continue simmering for 3 hours. Turn the squids around in between cooking. It's alright if the sauce reduced to 2/3. However if it get to thick, add hot water to dilute it.

      I used a thermal pot on my second attempt on this dish and I didn't have to add water. I just had to reboil it once. However, directly cooking does make the squids more tasty.

      Remove the squids when it's done and let it cool a bit before you slice it. It's a little tricky slicing it. You might want to oil your blade to do it. Meanwhile, turn up the heat and boil the sauce to thicken it a little.

      Drizzle some thicken sauce over the sliced squid and serve.


      { This is how it looks for my first attempt on the stuffed Squid; simmering for 3 hours over direct heat, ie, not using the thermal pot. The glutinous rice was plain and bland as I did not season it but the squid was in a deep shade of brownish orange. You can see from the rings that sauce had penetrated into the squid. }

      Tuesday, April 19, 2011

      Corn & Radish Soup
      白萝卜玉米汤


      This soup is especially good for those wants to try radish but dislike the smell and the slight bitter taste (like my husband :P). Adding a cob of corn help sweeten the soup and the smell of radish will not be as strong at the same time.

      Ingredients:
      • 1 Corn, cut into sections
      • 2 Carrot, cut into chunks
      • 1 Radish, cut into chunks
      • 8 Red Dates
      • a handful of Wolfberries
      • 300g Pork Ribs
      • 1.8 litre Wter
      • Salt to taste

      How to do it:
      1. Blanched pork ribs.
      2. Add all ingredients except wolfberries in pot.
      3. Bring it to a boil and reduce to a simmer.
      4. Continue to simmer for 2 hours.
      5. Add wolfberries during last 1/2 hour of cooking.
      6. Add salt to taste.
      7. Serve.

      Tuesday, April 5, 2011

      Radish and Ribs Stew 萝卜焖排骨


      I really love radish though there isn't anyone at home sharing the same sentiments. The only thing they will take with radish in it is probably soup.

      I just need a bowl of rice, maybe two to goes with this stew. I love how the radish in the stew here absorbed all the flavours. It's soft and flavourful and the bone from the ribs just slip off from the meat. And don't forget the sauce! Drizzle it over piping hot rice! Yum!

      Ingredients:
      • 300g Pork Ribs
      • 1 Carrot, skinned and cut into chunks (about 150g)
      • 1 Radish, skinned and cut into chunks (about 220g)
      • 1 small Onion, cut into chunks
      • 3 clove Garlic, smashed and chopped
      • 300ml Water
      • Salt to taste

      Seasonings:
      • 2 tablespoon Chinese Cooking Wine
      • 2 tablespoon Light Soy Sauce
      • 1 tablespoon Oyster Sauce
      • 1 tablespoon Brown Sugar or regular Sugar

      How to do it:
      1. Blanch ribs and set aside.
      2. Heat a tablespoon of oil.
      3. Stir fry garlic till fragrant.
      4. Add in the vegetables and rib.
      5. Stir fry for a minute before adding the seasoning.
      6. Add in water and bring to a boil.
      7. Reduce to a simmer and continue to cooking for 2 hours or till the ribs and radish are tender.
      8. Add more hot water if the sauce are drying but ribs & radish are not tender enough.
      9. Add salt to taste if necessary
      10. Serve with a bowl of rice.

      Note:
      • Cooking time maybe varies depending on the size of the vegetable chunks and the pork ribs.
      • To make the radish less bitter, precook the chopped radish by boiling it in water for 1 to 2 minutes.